Angular Signals and NgRx Signal Store: A Modern Approach to State Management
August 19th, 2025 | 6 min read
Last update: August 29th, 2025

Introduction to Angular Signals and State Management
So Angular has made some significant changes in the last years, and one of the more exciting ones for me personally is the introduction of Signals.
They have been experimental for a while, but in Angular v20 effect, linkedSignal and toSignal are now stable APIs (Angular Blog).
This is a big change for state management and I for one can finally say goodbye to zonejs .... Is what I would like to say if I had time to rewrite all work projects :)
I do have some time to write this blog post though, so let's get started!
Note: This post assumes you have basic knowledge of Angular and TypeScript. If you're new to state management concepts, I recommend getting familiar with basic Angular concepts first. Here are links to get you started:
- Angular Official Documentation
- Roadmap.sh Angular (if you prefer a more visual approach)
- TypeScript Handbook
- Roadmap.sh TypeScript (if you prefer a more visual approach)
- RxJS Documentation
What are Angular Signals?
Angular Signals are all about reactivity, which is the ability to respond to changes in data which in turn allows us to react to changes in either UI or logic. They can contain any primitive or complex value and the neat thing about them is that Angular automatically tracks their usage.
This is useful for performance improvements, as Angular can optimize change detection by only updating components that have signal changes.
But my use case (and also topic of this blog post) is state management; and more specifically the ngrx/signals package.
It provides a nice way to manage state in Angular applications using signals without getting overly complicated.
I am going to use signals a lot in the later sections, so here is a link if you want to read more about them:
Basic Signal Usage
Let's start with some basic examples to understand how signals work:
import { Component, signal, computed, effect } from '@angular/core';

@Component({
  selector: 'app-counter',
  template: `
    <div>
      <h2>Counter: {{ count() }}</h2>
      <h3>Double: {{ doubleCount() }}</h3>
      <button (click)="increment()">Increment</button>
      <button (click)="decrement()">Decrement</button>
    </div>
  `
})
export class CounterComponent {
  // Writable signal
  count = signal(0);

  // Computed calculates a new value when tracked signals change
  doubleCount = computed(() => this.count() * 2);

  constructor() {
    // Effect - runs when dependencies e.g. tracked signals change
    effect(() => {
      console.log(`Count changed to: ${this.count()}`);
    });
  }

  increment() {
    this.count.update(value => value + 1);
  }

  decrement() {
    this.count.update(value => value - 1);
  }
}
This example shows three concepts of Angular Signals:
- Writable Signals:
signal(0)creates a signal that can be updated. - Computed Signals:
computed(() => this.count() * 2)derives a value from other signals, automatically updating when the source signal changes. - Effects:
effect(() => { ... })runs whenever the tracked signals change, allowing you to perform side effects like logging.- Don't overuse effects, they can be a major performance problem as they track multiple signals and run whenever any of them change.
- I prefer to update values that are not heavily affecting the UI
With that out of the way, let's move on to the interesting part: The NgRx Signal Store :)
Why NgRx Signal Store?
As mentioned earlier, I use the ngrx/signals package for state management in Angular applications.
Signals alone are a good tool to manage local component states but are not optimal for larger complex applications.
This is where the NgRx Signal Store comes into play. It allows the combination of RxJS and Angular Signals with typescript to create a pretty flexible state management solution.
Let's install the package first:
pnpm install @ngrx/signalsSimple Matcha Store Example
Now we create a simple store to manage a matcha tea counter.
import { signalStore, withState, withMethods, patchState } from '@ngrx/signals';

// Define the state interface
interface MatchaState {
  cups: number;
  brewing: boolean;
}

// Create the initial state
const initialState: MatchaState = {
  cups: 0,
  brewing: false
};

// Create the signal store
export const MatchaStore = signalStore(
  { providedIn: 'root' },

  withState(initialState),

  withMethods((store) => ({
    brewMatcha() {
      if (!store.brewing()) {
        patchState(store, { brewing: true });

        setTimeout(() => {
          patchState(store, {
            cups: store.cups() + 1,
            brewing: false
          });
        }, 2000);
      }
    },

    drinkMatcha() {
      if (store.cups() > 0) {
        patchState(store, { cups: store.cups() - 1 });
      }
    },

    resetMatcha() {
      patchState(store, initialState);
    }
  }))
);An important thing to note is the
withStatemethod. It usesDeepSignalsfor complex state objects, which means that the state properties (and sub-properties) are automatically converted to signals.
Now let's use this store in a component:
import { Component, inject } from '@angular/core';
import { MatchaStore } from './matcha.store';

@Component({
    selector: 'app-matcha',
    template: `
        <div class="matcha-counter">
            <h2>🍵 Matcha Counter</h2>
            <p>Cups available: {{ store.cups() }}</p>
            <p>Status: {{ store.brewing() ? 'Brewing...' : 'Ready' }}</p>

            <div class="actions">
                <button
                    (click)="store.brewMatcha()"
                    [disabled]="store.brewing()">Brew Matcha</button>
                <button
                    (click)="store.drinkMatcha()"
                    [disabled]="store.cups() === 0">Drink Matcha</button>
                <button (click)="store.resetMatcha()">Reset</button>
            </div>
        </div>
    `,
    styles: [
        `
            .matcha-counter {
                padding: 20px;
                border: 1px solid #4ade80;
                border-radius: 8px;
                max-width: 300px;
            }
            .actions {
                display: flex;
                gap: 8px;
                flex-wrap: wrap;
            }
            button {
                padding: 8px 16px;
                border: none;
                border-radius: 4px;
                background: #16a34a;
                color: white;
                cursor: pointer;
            }
            button:disabled {
                background: #9ca3af;
                cursor: not-allowed;
            }
        `,
    ],
})
export class MatchaComponent {
    store = inject(MatchaStore);
}
Here is a screenshot of the Matcha Store component so you don't need to image how it's used:
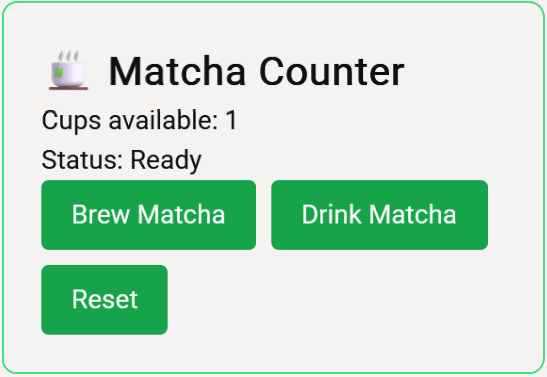
This example demonstratates how the logic for the matcha counter is not tightly coupled to the component, making it reusable across various parts of the application. We are basically only using the store signals to display the state and the methods to update the state. No other logic is needed in the component.
What's Next?
Now this matcha counter is pretty simple, so in the next posts in this series, we will explore more complex scenarios:
- Store enhancements using
signalStoreFeature - Practical implementations of NgRx Signal Store
- CRUD state management patterns
More links to explore
That's all for now—hopefully, you found this post helpful and learned something new about Angular's modern state management approach :)